Thursday, March 26, 2020

Butterfly Beauty


I am participating in the Less is More Challenge using colors: Red, Raspberry, and Grey.
#415 Less is More Challenge
 
All of the ©Stampin' Up! products used, with the exception of the paper,  are still available.  You can still place your order and take advantage of free products from Sale-A-Bration catalog.  

The real star of this is the Large Die cut in the center- Butterfly Beauty. I die cut this out of all three colors, then cut the Image dies using all three colors.  I cut it apart to get the variety of colors behind the gray.  I'm pretty happy with how turned out.


Please order online and use Hostess code:
7ZPAKZ3F


What I did:
 STAMPS: Beauty Abounds(SU!) stamp set. Sentiment: Butterfly Gala 
CARDSTOCK & PAPER: Basic Gray (SU!), real Rd, Melon Mambo (SU!), and White(SU!) card base: cut 5.5 x 8 1/2 scored at 4.25, Whisper White(SU!) strip, adhering it to the card base with dimensional , after everything was stamped on it.
INK:Flirty Real Red
OTHER: Butterfly Beauty Thinlits Dies, Snail Adhesive(SU!), dimensionals, Tear & Tape (SU!) Simply Scored (SU!) Scissor snips, red ribbon
TECHNIQUE: Die cut out everything out first, then fit your pieces together and adhere to background paper.

Tuesday, March 24, 2020

Perfect Placement

The other day, I shared some Timeless Tulip cards that I made using both the stamps and the punch.  Here is how you can get the most out of Stamps and punches.

I hope you have perfect placement from now on.

Sale-A-Bration is still going on for one more week.  

Please order online and use Hostess code:
7ZPAKZ3F


Monday, March 23, 2020

Timeless Tulips in Time fo Spring


How pretty are these cards?  I was inspired by Linda Dalke from www.lhiggins.blogspot.com and made a few changes with things I had on hand.  Using just a few supplies I was able to create these beautiful cards.  I used the Timeless Tulips Bundle. What a great set to own.  7 different sentiments along with several sizes of tulips, leaves, and stems.  You can mix and match and have endless combinations. The punch is a fantastic addition.  It adds just the right dimension.  You can use it with the stamped image or alone on solid or pattern paper.
Come back here tomorrow to see a short-cut on how to stamp and punch out in an easy step all while saving paper.
I did use a few other supplies to create the background.  I used the large long stitched rectangle die to ground the tulips.  I also us the script die from Parisian Beauty Stamp Set. I tried the script stamping directly on the cardstock and also on Vellum. They both turned out great- the Vellum took much longer to dry. I created the script background using the Stamparatus and moving down one hinge each time until I filled the page. I mounted the Petal Pink Card on a tent-fold card and added the Easter message inside. Some of my friends may be seeing this card in their mail, soon.


What I did:
 STAMPS: Timeless Tulips(SU! Occasions Catalog) stamp set and Parisian Beauty for thee script background.
CARDSTOCK & PAPER: White(SU!) card base: cut 4.25 x 10 scored at 5.5 for tent fold, Petal Pink 5.25 x 4, and Whisper White(SU!) long rectangle stitched die.
INK:Calypso Coral, Petal Pink, and Mossy Meadow
OTHER: Snail Adhesive(SU!), dimensionals, Tear & Tape (SU!) Simply Scored (SU!) Scissor snips, Stamparatus
TECHNIQUE: No special technique was used.  Tomorrow I will show you how to use the Tulip punch and how to make the most out of paper and save time.  The biggest trick is if you stamp on Vellum, make sure it is dry before adhering it to the background.  I did use dimensionals to pop up the leaves and front tulip.  I love the long stems because you can bend them and curve them on your long acrylic block to go any direction.

Supplies:


Something Else you can make with his set:


I've also seen the tulips stamped upside down to create Jellyfish.  I've gotta try that.

Happy Stamping.  Share what you have created with this set.
Leave a comment to be entered in random drawings all month long to win free prizes!!


Sunday, March 22, 2020

Time To Craft

What else are you going to do?  You may as well make some cards and send them out to people.

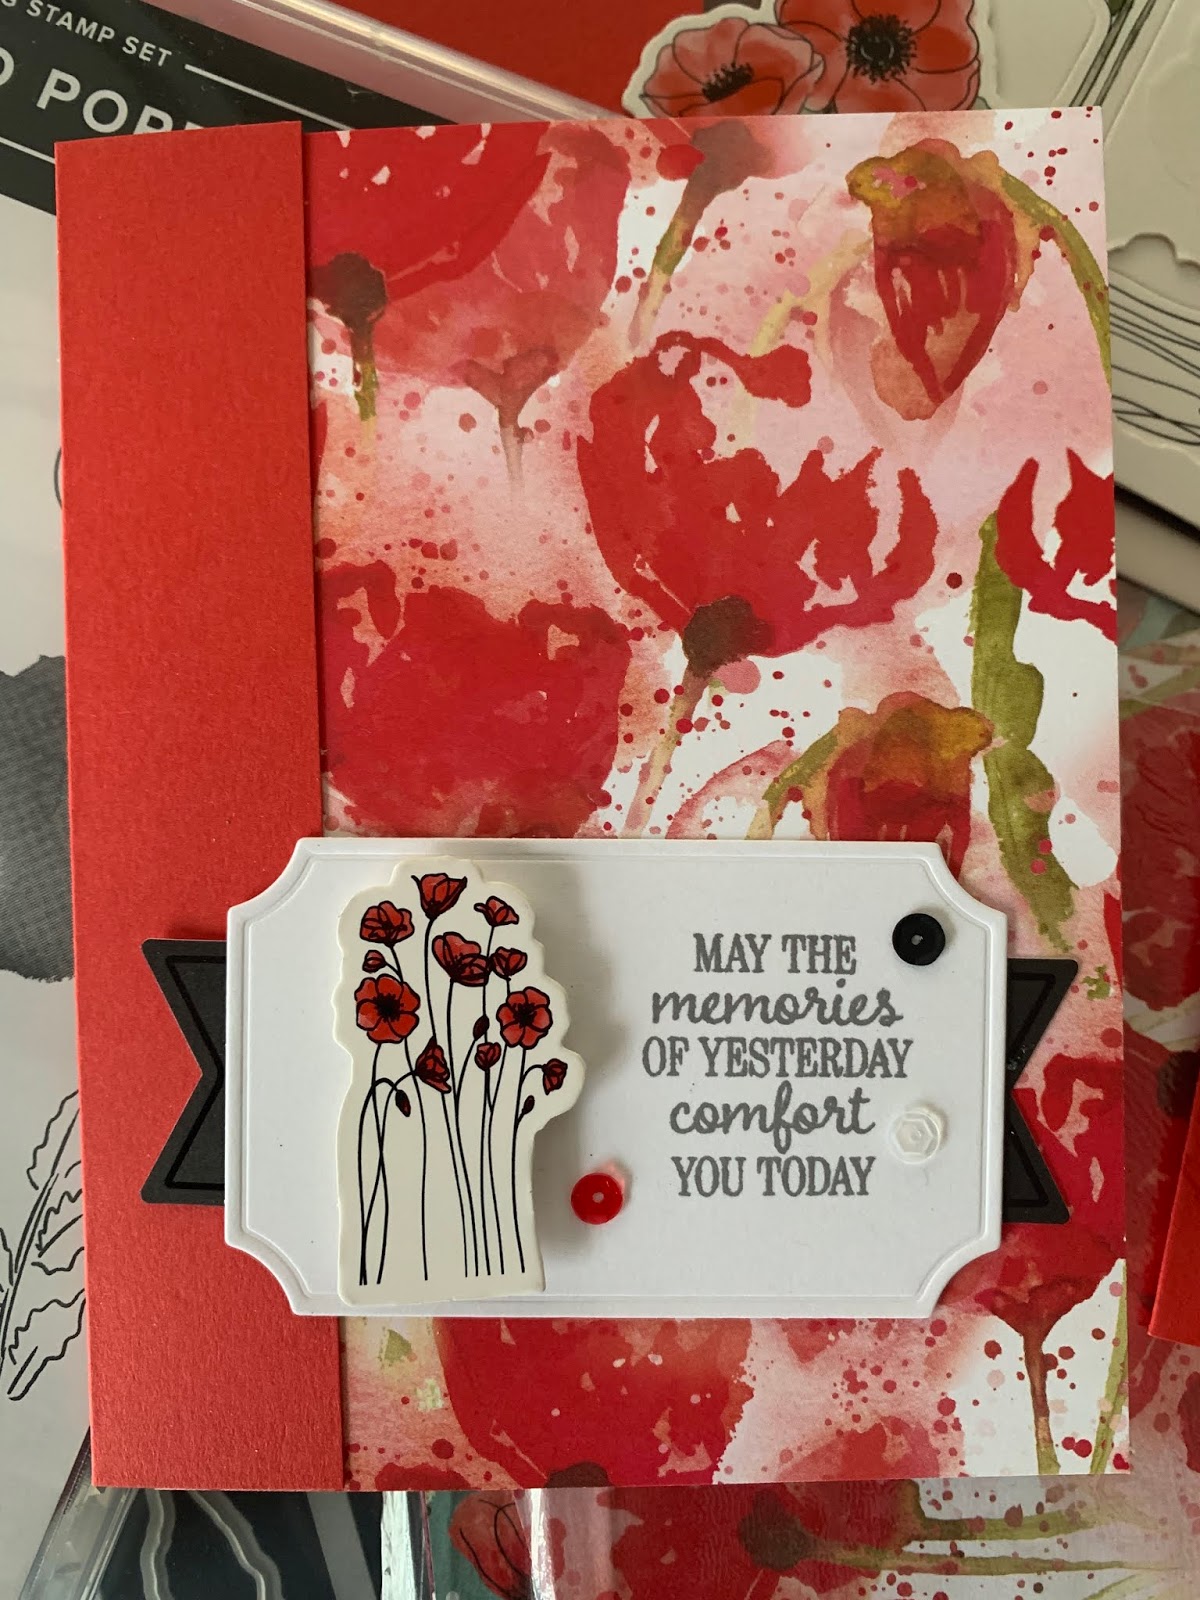
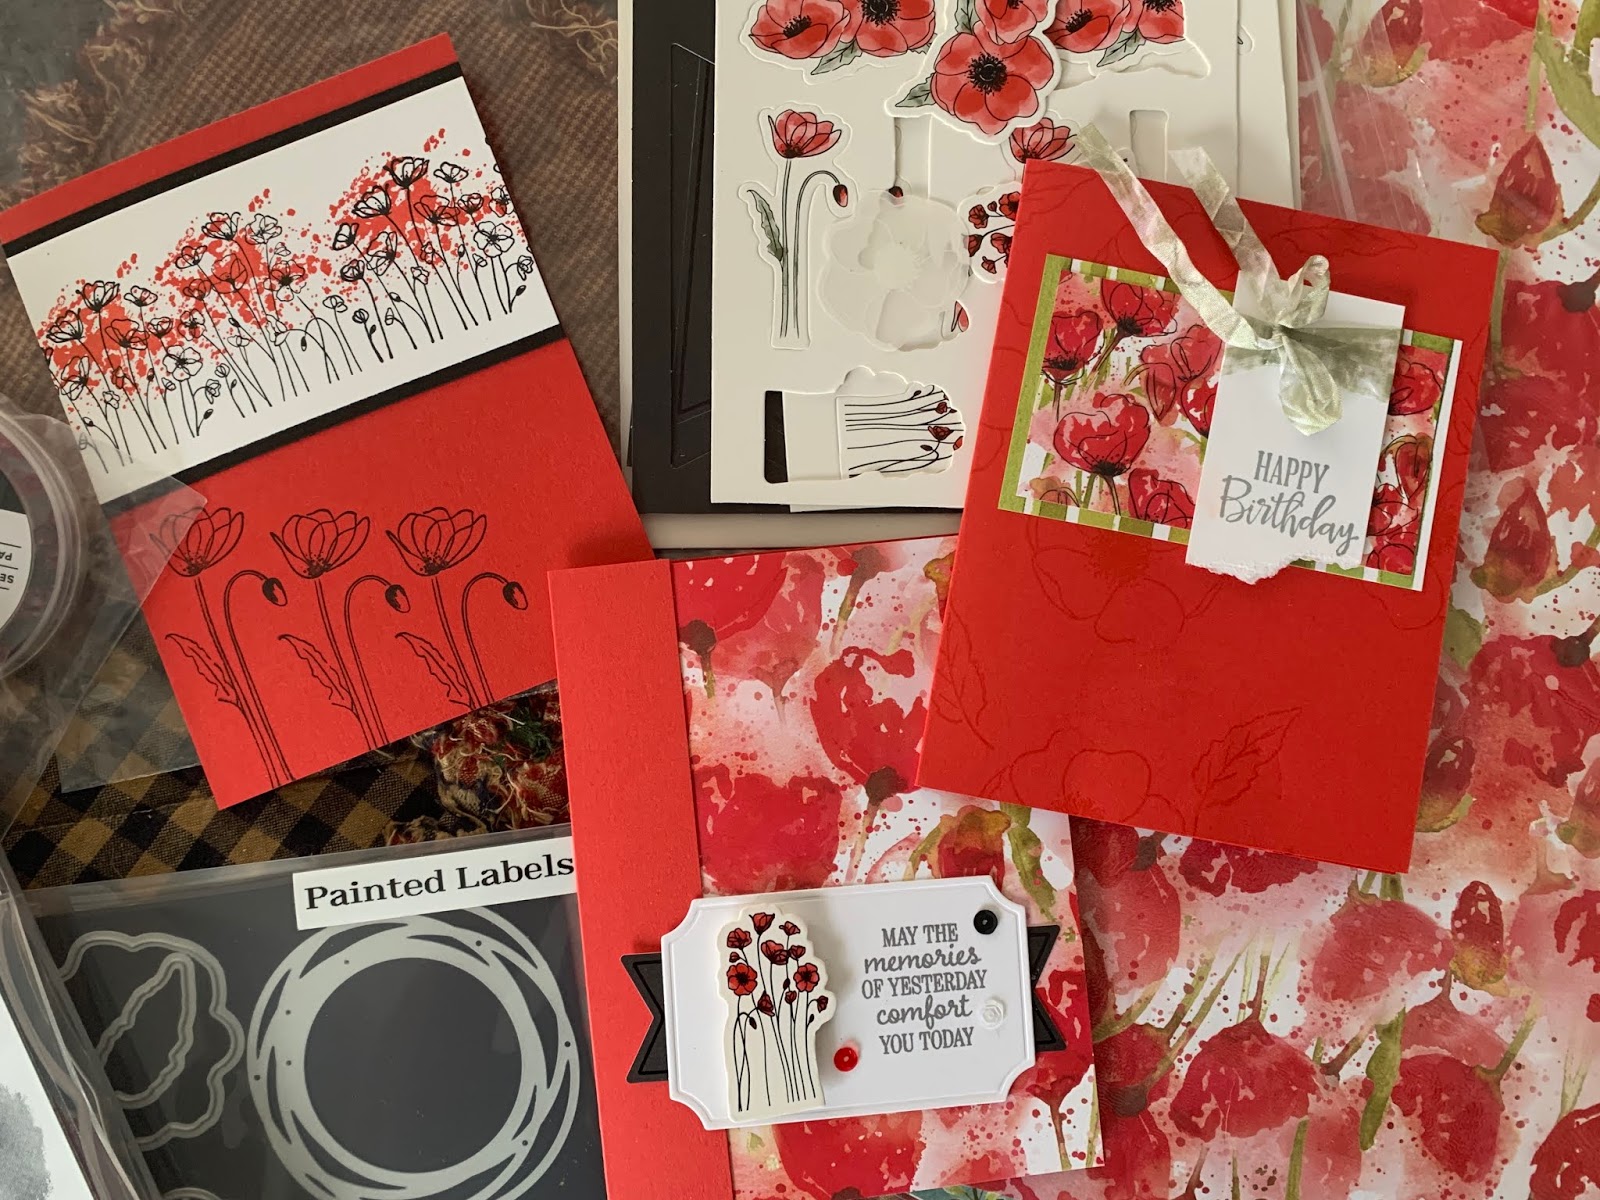
You can't go wrong with Stamping' Up! Peaceful Poppies Suite from Pgs. 24 - 27 in the Mini Jan. - June catalog!
This card was made using mostly paper and the Peaceful Poppy Elements product number: 151327 for only $6.50

I know the calendar says it's officially spring but the thermometer reads as it's still February.  Use some Poppy Parade Cardstock to coordinate with the Peaceful Poppy Designer Paper 151324 and you have a bright springtime card!
I used a sentiment from Timeless Tulips here.  I will be posting a project from that set, tomorrow.
The Basic Gray149165 ink used for the sentiment is a little softer than harsh Basic Black can be.   I also used Peaceful Poppy Sequins to add a little bling.

Peaceful Poppy Elements: Look at all the elements you get for $6.50.  These are all pre-cut and ready for you to add to any project.  They just add a little something extra- especially for those of us who don't have a lot of little doo-dads hanging around to embellish our projects.


For the Inside, I used the Painted Poppies Stamp Set 151599.  The Ink splatter stamp makes a great faux sponging technique when stamped along the edge.

What I did: 
 STAMPS:
Stamp Set: Painted Poppies 151599
Sentiment: Timeless Tulips
CARDSTOCK & PAPER:
Poppy Parade cut 5 1/2 x 5 3/8, scored at 4 1/2.  Peaceful Poppies DSP  cut 5 1/2 x 4 1/4, White(SU!) card insert :  Whisper White(SU!) cut 5.25 x 4, adhering it to the inside card base using Tear & Tape after everything was stamped on it.
 INK:Poppy Parade 147050 & Basic Grey 149165
 OTHER: Snail Adhesive(SU!), dimensionals, Tear & Tape (SU!) Simply Scored (SU!) Scissor snips TECHNIQUE: First, I cut all the card stock and DSP.  Fold the Poppy Parade Card stock on the scored line and adhere the DSP paper the the inside. Then I stamped my message to one of the die cuts from Peaceful Poppy Elements and layered it on top of the dark tag from the Peaceful Poppy elements.  I adhered it all to the card front and then added another Peaceful Poppy Floral element using dimensionals. I also placed a few Peaceful Poppy Sequins on the front. I stamped the White Cardstock along the edge with Painted Poppies Large Paint Slatter- half on-half- off the paper with Poppy Parade ink.  I also added The Poppy from the same stamp set along the left- hand side.  StLast, I centered and adhered the white card front to the base.
 Products available at my Stampin' Up Store: Remember, through the month of March, for every $50 of product you purchase, you get free items from the Sale-A-Bration catalog.  Order and get everything delivered to your house use Hostess code: 7ZPAKZ3F

Look what else you can make with this amazing suite:
Order Painted Poppies Bundle this month and I'll send you 2 FREE adhesives.

Sunday, February 16, 2020

Snappy Birthday


Sometimes easy can be beautiful.


Today's card uses an older stamp set -Shark Bites by Newton's Nook Designs. I used a little Distress Oxide ink on a sponge in the background with colors Broken China and Tumbled Glass.  I stamped the image with Black Momento and then  colored with Stamping' Blends Light Sea Side Spray, Dark Sea Side Spray, and Light Night of Navy.

Once all was dried I centered the largest Stitched Die on it and Die-cut it out and mounted on a regular card base. I added a small stamp image to the inside to leave plenty of room for a note.


I've been pairing all my cards with envelopes, lately.  This one I was able to add some fun to Shark images to the front.  I am always looking for a more masculine card and I think I've found it here.  Be sure to leave a comment on how you are  creating beautiful, easy cards.


What I did: 
 STAMPS: Shark Bites by Newton's Nook Designs.
CARDSTOCK & PAPER: White(SU!) card base: cut 5.5 x 8 1/2 scored at 4.25
INK:Momento Basic Black
OTHER: Foam tape, Stitched Rectangular Frames (SU!), Simply Scored (SU!) Stampin' Blends(SU!)


Stitched Rectangle Dies148551
Price: $35.00
Creating die-cut shapes like these stitched rectangles is easy using the Stitched Rectangles Dies. 

Dies help you create unique die cuts with just a quick run through your die-cutting and embossing machine. Detailed dies include ejection holes so you can remove the paper easily. 

* 13 dies 
* Largest die: 5-1/4" x 3-7/8" (13.3 x 9.8 cm)
* Use with a die-cutting and embossing machine

I use these all the time.  
They are a staple to your stamping supplies.


Sunday, January 12, 2020

Goals, Challenges, and More, Oh My!!!


Did you know there are 5 things that you can do that can help you reach your goals 80% more of the
time.  People who do these 5 things are 80% more likely to reach their goals than people who don't.
What are they? Back to that in a minute.  One of my goals is for my Blog to reach more people and to participate in more card challenges this year. I think these are connected, because when I post a new project to a challenge, that link is shared with all the other participants.  I'm hopeful that some will click on my blog and find some inspiration.  My other goal: I would like 5 new SU! customers.  This one is a little trickier, but I'm trying.
1. Have a compelling reason- for your goal
2. Visualize yourself reaching the goal
3. Give yourself a reward
4. Stay Positive
5. Believe in yourself

Same actionable Things you can do today to help you reach your goals:
1. Write them down
2. Tell someone
3. Post it somewhere so many people can see (think social media, blog...)
4. Start small- pick one goal

So here I am.  Posting my newest challenge here.
I am entering my HELLO THERE card for 2 challenges: Less is More #402 Color challenge and Global Design Project #222 Sketch Challenge


Less is More #410

GDP#222


Saturday, January 4, 2020

Happy New Year!

#Simple Stamping only used Stamp Set Parisian Beauty

Bonne Année 

I am so excited to share some of the fun cards I've made using the new Parisian Beauty Cling Stamps and Parisian Dies from the New Mini Catalog.

I've also been decorating my envelopes, too.  I don't know why I haven't done this sooner.  It adds so much.  Don't you like getting pretty mail- so do your recipients.

These Stamps and Dies are so intricate you don't need to add  much.  This is Simple Stamping at its best, but looks so elegant.


Card Recipe:

Stamps: PARISIAN BEAUTY and FOREVER BLOSSOMS from Mini Catalog
Sentiments:  FOREVER BLOSSOMS
PARISIAN BEAUTY from Mini Catalog
Dies: PARISIAN DIES
Paper: Cherry Cobbler, Pool Party, Basic Black, Whisper White,
PARISIAN BLOSSOMS DSP


Parisian Beauty DSP