Sunday, April 26, 2020

Last Chance Products & So Much More

Last chance products
Stampin' Up!® will be launching their the new Annual Catalog with many exciting products in June. You aren't going to believe the new items! 2 new die cutting machines, new colors of ink and paper, new adhesive and so much more.  
That means that many products are Retiring, are discounted, and are available only through June 2 or while supplies last.  While Supplies Last! is an important phrase. I learned the hard way when I was waiting to fill my basket and logged in, the next day, and a few of the kits were gone. 😢


Don't miss your last chance to get stamps, inks, paper, and dies before they are gone. Click the caption below the image to be taken to my store of Last Chance products.

Use Hostess Code: EPRCPEGA


*These items will not 🚫 be in the upcoming new annual catalog that goes live in June, so this is your last chance to snap them up--and they are ONLY AVAILABLE WHILE SUPPLIES LAST! Some are also discounted! 
Contact me to place an order, or use this host code: EPRCPEGA

Paper Pumpkin- NEW In Colors®

Paper Pumpkin
If you have never subscribed to Paper Pumpkin or haven't had a subscription for awhile, believe me, you will want to subscribe now to the Paper Pumpkin® monthly card making kit (single month or multi-month subscriptions available). Everything you need to make gorgeous cards and decor in one box. Always Includes ink, stamps, paper, envelopes and embellishments.  
May's kit features the new In Colors®. I can't wait to see them up close. Must order by May 10 to get the newest kit.

Click the caption under the image to subscribe. Just try it for 1 month- I know you're going to love it.

Happy shopping- I am here to help-
Everyone who orders will be put into a drawing for the host rewards, if I get enough orders for a workshop. If not, you will be put into a raffle for a special gift from me 🎁
Let me know if you have any questions ❓
Hostess code good though May 8: EPRCPEGA


Thursday, April 16, 2020

Time for sharing


April has proven to be a very busy month.  Spring Break was lovely, but this remote learning thing is
rough on everyone.  I love how understanding my staff has been at the speed at which I get back to everyone's tech. needs.  I fall asleep, right away every night.  Exhausted.

We just recently had a  card challenge with my girls and here are some of the beautiful cards that came from that.  I am making an attempt to mail something out every day.  I certainly have plenty of cards to do that.
Love this cute fold:
 There's a perfect place for a message on the white space on other side and it won't be seen until the card is opened.  Love the paper- Stanpin' Up!


This was my contribution- Smile-  I thought this was a perfect card to send out, now.  Everyone could use a reminder to smile.  Great use of the oval within another oval to create a frame.


I will be happy to share my Smile card tutorial in a future post.

Until then...
SMILE 


Friday, March 27, 2020

Time for Fun Fold


Look how fun these are!  Thank you Connie Stewart for the Idea. Love her ideas and her website.  Take a look at the following pictures to see how this card works.  I loved that I was able to use the Free SAB set for this card.  You have until the end of March- only a few more days to get this stamp
set for free. I am entering the Happy Birthday Card in a Challenge.  This is the first time I have joined AAA Birthday.  each month these challenges have to be Birthday Cards.  How perfect!  Everyone always needs Birthday Cards.
AAA March Challenge- Flowers
This is a fun fold and not that difficult at all. Using the Rectangle Stitched Dies made this an easy fit.

Please order online and use Hostess code:
7ZPAKZ3F

Recipe:

STAMPS:
Thoughtful Blooms(SU! 2020 SAB FREE SET) stamp set. Piece of Cake (SU! Regular Catalog)
 Sentiment: Peaceful Moments (SU! 2020 Spring Mini Catalog)
CARDSTOCK & PAPER:
White 5 1/4 x 8 scored at  2in. and 4in. accordion folded, white 2 1/2 x 3 1/2
Rose Rococco Card Base 8 x 5 1/2 scored  4 1/4
Dies: Rectangle Stitch Thinlet (SU!)
OTHER: Snail Adhesive(SU!), dimensionals, Tear & Tape (SU!) Simply Scored (SU!) Scissor snips
Please order online and use Hostess code:
7ZPAKZ3F


Thursday, March 26, 2020

Butterfly Beauty


I am participating in the Less is More Challenge using colors: Red, Raspberry, and Grey.
#415 Less is More Challenge
 
All of the ©Stampin' Up! products used, with the exception of the paper,  are still available.  You can still place your order and take advantage of free products from Sale-A-Bration catalog.  

The real star of this is the Large Die cut in the center- Butterfly Beauty. I die cut this out of all three colors, then cut the Image dies using all three colors.  I cut it apart to get the variety of colors behind the gray.  I'm pretty happy with how turned out.


Please order online and use Hostess code:
7ZPAKZ3F


What I did:
 STAMPS: Beauty Abounds(SU!) stamp set. Sentiment: Butterfly Gala 
CARDSTOCK & PAPER: Basic Gray (SU!), real Rd, Melon Mambo (SU!), and White(SU!) card base: cut 5.5 x 8 1/2 scored at 4.25, Whisper White(SU!) strip, adhering it to the card base with dimensional , after everything was stamped on it.
INK:Flirty Real Red
OTHER: Butterfly Beauty Thinlits Dies, Snail Adhesive(SU!), dimensionals, Tear & Tape (SU!) Simply Scored (SU!) Scissor snips, red ribbon
TECHNIQUE: Die cut out everything out first, then fit your pieces together and adhere to background paper.

Tuesday, March 24, 2020

Perfect Placement

The other day, I shared some Timeless Tulip cards that I made using both the stamps and the punch.  Here is how you can get the most out of Stamps and punches.

I hope you have perfect placement from now on.

Sale-A-Bration is still going on for one more week.  

Please order online and use Hostess code:
7ZPAKZ3F


Monday, March 23, 2020

Timeless Tulips in Time fo Spring


How pretty are these cards?  I was inspired by Linda Dalke from www.lhiggins.blogspot.com and made a few changes with things I had on hand.  Using just a few supplies I was able to create these beautiful cards.  I used the Timeless Tulips Bundle. What a great set to own.  7 different sentiments along with several sizes of tulips, leaves, and stems.  You can mix and match and have endless combinations. The punch is a fantastic addition.  It adds just the right dimension.  You can use it with the stamped image or alone on solid or pattern paper.
Come back here tomorrow to see a short-cut on how to stamp and punch out in an easy step all while saving paper.
I did use a few other supplies to create the background.  I used the large long stitched rectangle die to ground the tulips.  I also us the script die from Parisian Beauty Stamp Set. I tried the script stamping directly on the cardstock and also on Vellum. They both turned out great- the Vellum took much longer to dry. I created the script background using the Stamparatus and moving down one hinge each time until I filled the page. I mounted the Petal Pink Card on a tent-fold card and added the Easter message inside. Some of my friends may be seeing this card in their mail, soon.


What I did:
 STAMPS: Timeless Tulips(SU! Occasions Catalog) stamp set and Parisian Beauty for thee script background.
CARDSTOCK & PAPER: White(SU!) card base: cut 4.25 x 10 scored at 5.5 for tent fold, Petal Pink 5.25 x 4, and Whisper White(SU!) long rectangle stitched die.
INK:Calypso Coral, Petal Pink, and Mossy Meadow
OTHER: Snail Adhesive(SU!), dimensionals, Tear & Tape (SU!) Simply Scored (SU!) Scissor snips, Stamparatus
TECHNIQUE: No special technique was used.  Tomorrow I will show you how to use the Tulip punch and how to make the most out of paper and save time.  The biggest trick is if you stamp on Vellum, make sure it is dry before adhering it to the background.  I did use dimensionals to pop up the leaves and front tulip.  I love the long stems because you can bend them and curve them on your long acrylic block to go any direction.

Supplies:


Something Else you can make with his set:


I've also seen the tulips stamped upside down to create Jellyfish.  I've gotta try that.

Happy Stamping.  Share what you have created with this set.
Leave a comment to be entered in random drawings all month long to win free prizes!!


Sunday, March 22, 2020

Time To Craft

What else are you going to do?  You may as well make some cards and send them out to people.

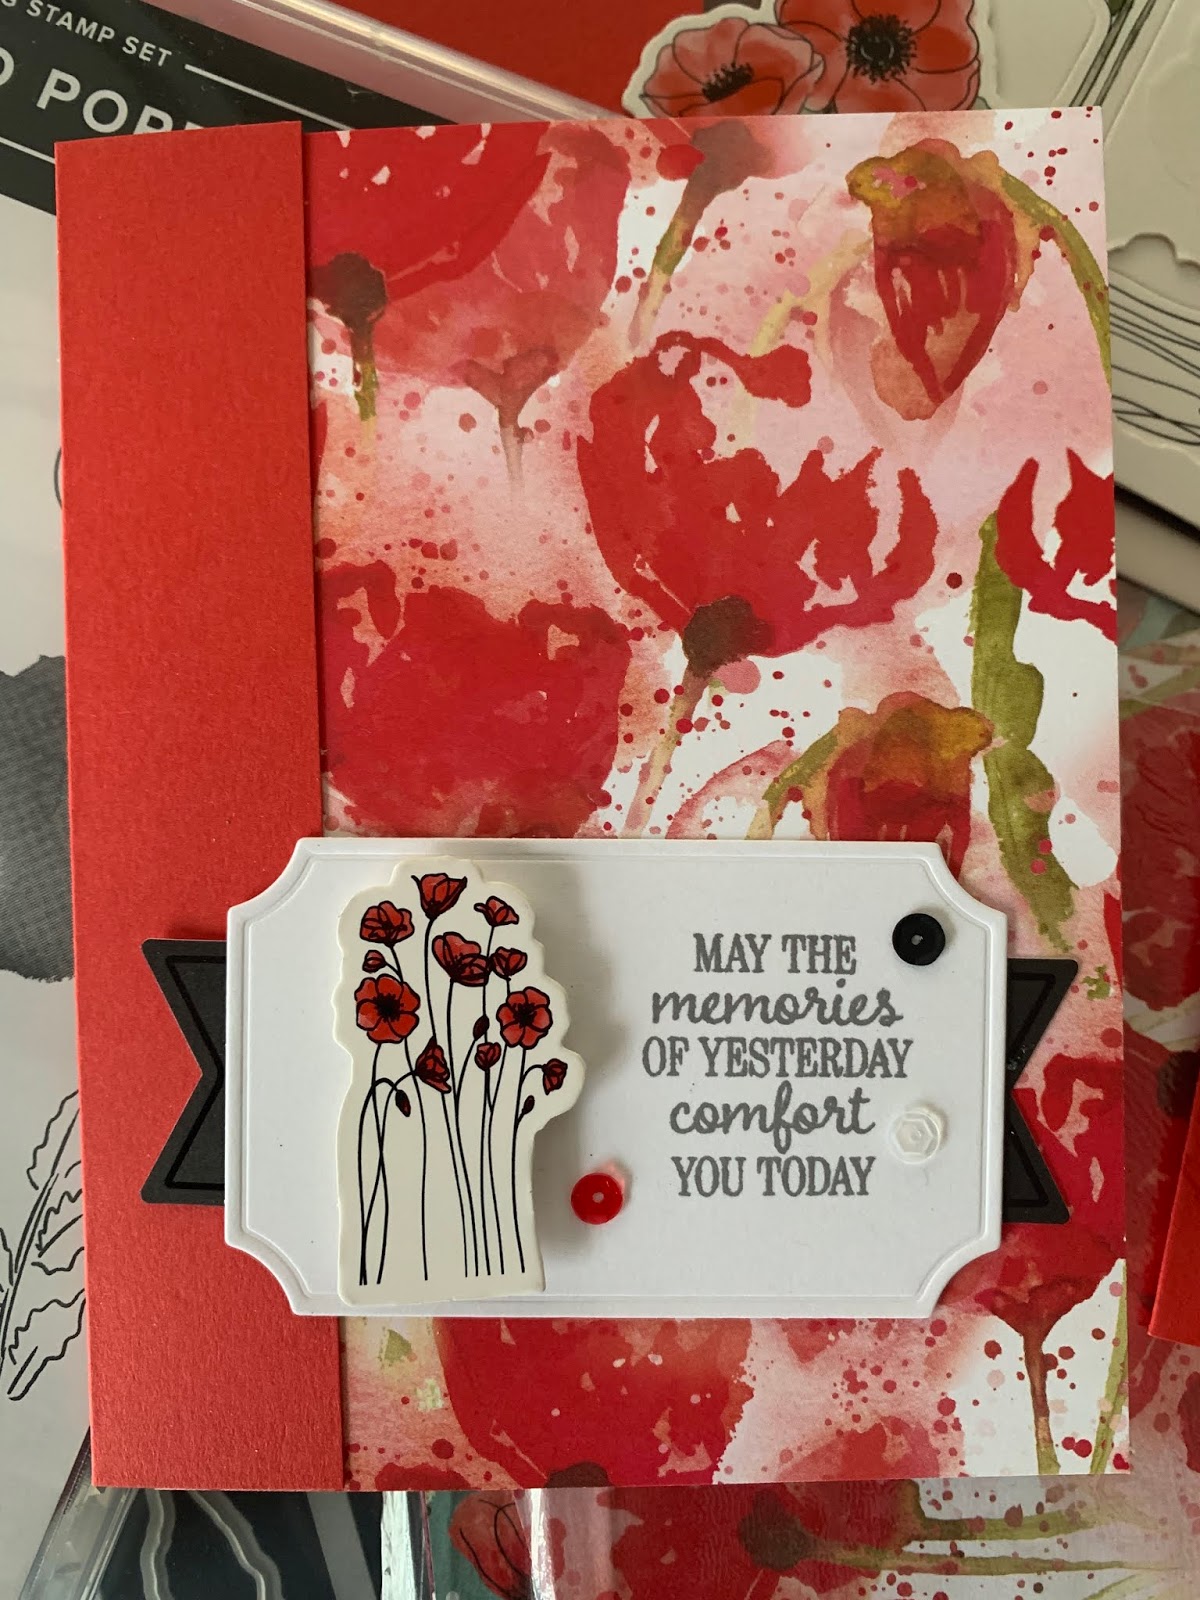
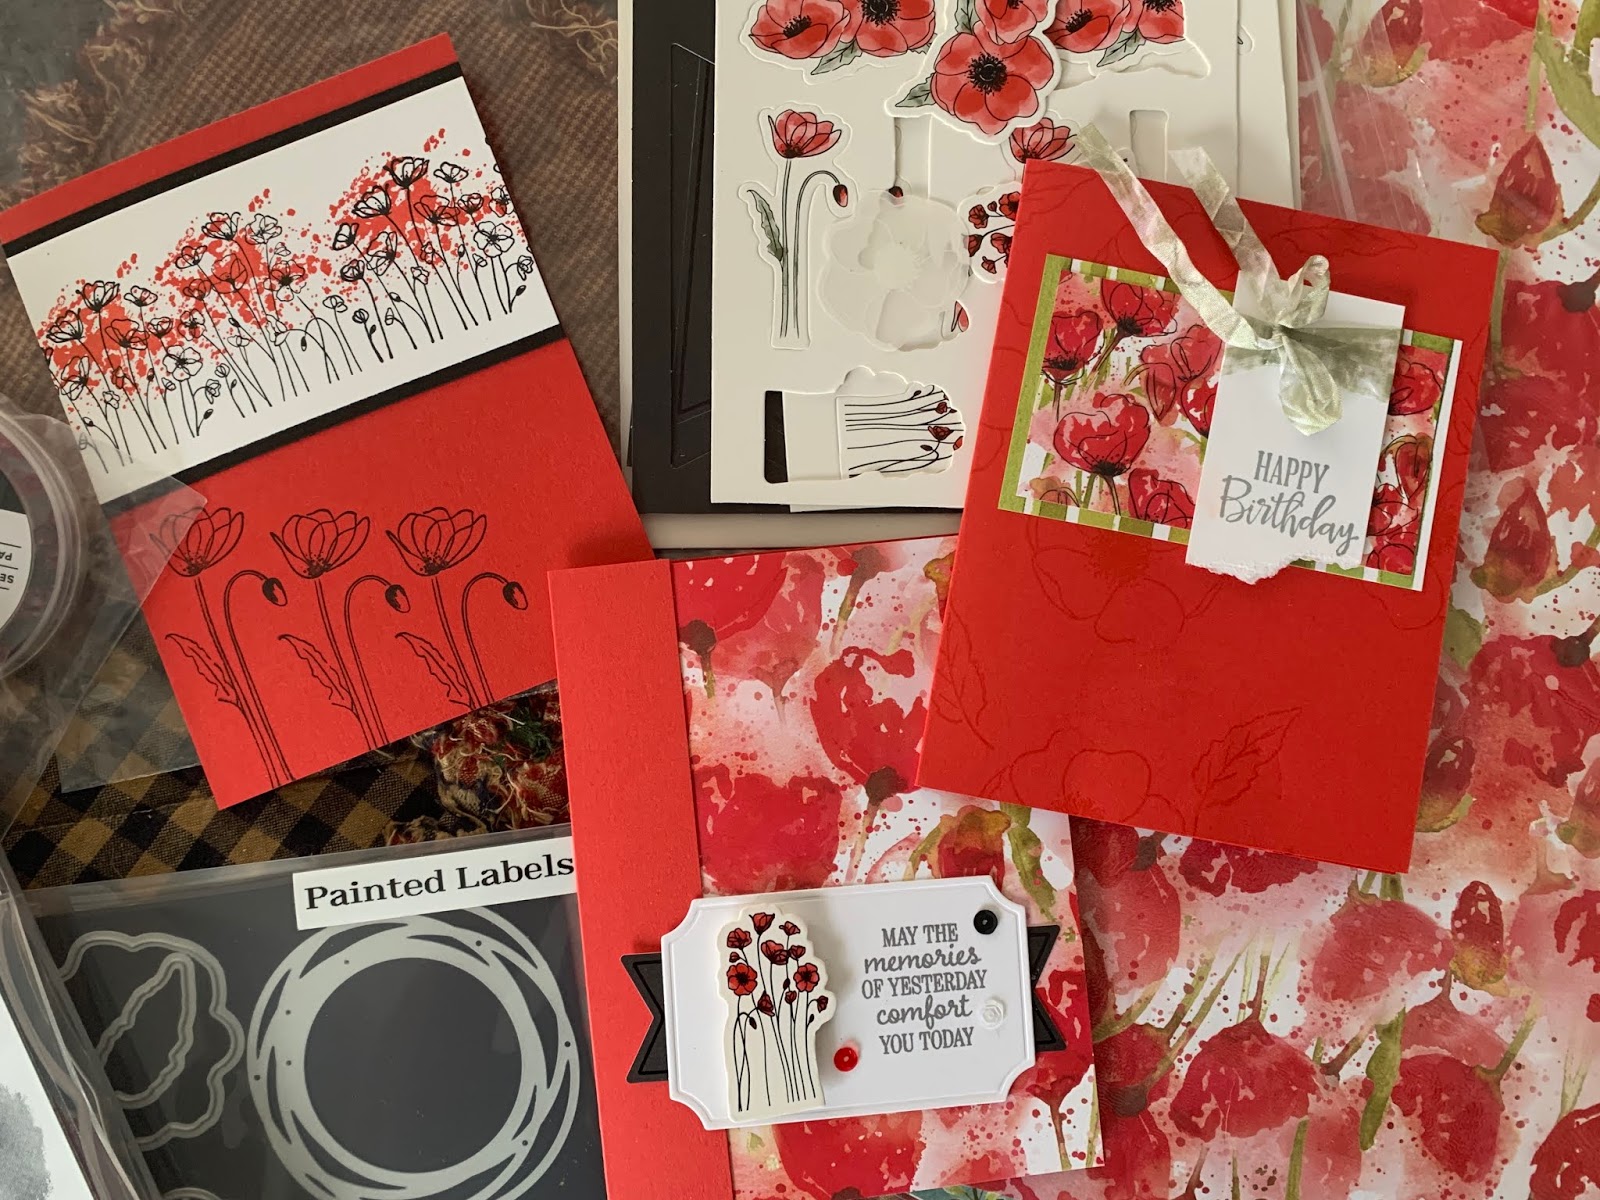
You can't go wrong with Stamping' Up! Peaceful Poppies Suite from Pgs. 24 - 27 in the Mini Jan. - June catalog!
This card was made using mostly paper and the Peaceful Poppy Elements product number: 151327 for only $6.50

I know the calendar says it's officially spring but the thermometer reads as it's still February.  Use some Poppy Parade Cardstock to coordinate with the Peaceful Poppy Designer Paper 151324 and you have a bright springtime card!
I used a sentiment from Timeless Tulips here.  I will be posting a project from that set, tomorrow.
The Basic Gray149165 ink used for the sentiment is a little softer than harsh Basic Black can be.   I also used Peaceful Poppy Sequins to add a little bling.

Peaceful Poppy Elements: Look at all the elements you get for $6.50.  These are all pre-cut and ready for you to add to any project.  They just add a little something extra- especially for those of us who don't have a lot of little doo-dads hanging around to embellish our projects.


For the Inside, I used the Painted Poppies Stamp Set 151599.  The Ink splatter stamp makes a great faux sponging technique when stamped along the edge.

What I did: 
 STAMPS:
Stamp Set: Painted Poppies 151599
Sentiment: Timeless Tulips
CARDSTOCK & PAPER:
Poppy Parade cut 5 1/2 x 5 3/8, scored at 4 1/2.  Peaceful Poppies DSP  cut 5 1/2 x 4 1/4, White(SU!) card insert :  Whisper White(SU!) cut 5.25 x 4, adhering it to the inside card base using Tear & Tape after everything was stamped on it.
 INK:Poppy Parade 147050 & Basic Grey 149165
 OTHER: Snail Adhesive(SU!), dimensionals, Tear & Tape (SU!) Simply Scored (SU!) Scissor snips TECHNIQUE: First, I cut all the card stock and DSP.  Fold the Poppy Parade Card stock on the scored line and adhere the DSP paper the the inside. Then I stamped my message to one of the die cuts from Peaceful Poppy Elements and layered it on top of the dark tag from the Peaceful Poppy elements.  I adhered it all to the card front and then added another Peaceful Poppy Floral element using dimensionals. I also placed a few Peaceful Poppy Sequins on the front. I stamped the White Cardstock along the edge with Painted Poppies Large Paint Slatter- half on-half- off the paper with Poppy Parade ink.  I also added The Poppy from the same stamp set along the left- hand side.  StLast, I centered and adhered the white card front to the base.
 Products available at my Stampin' Up Store: Remember, through the month of March, for every $50 of product you purchase, you get free items from the Sale-A-Bration catalog.  Order and get everything delivered to your house use Hostess code: 7ZPAKZ3F

Look what else you can make with this amazing suite:
Order Painted Poppies Bundle this month and I'll send you 2 FREE adhesives.